This post summarizes the MyST official documentation guidelines, highlighting the key points.
0. Prerequisites
- Ensure Python and git are installed.
- Install TeX-related packages. (https://
www .tug .org /texlive/) On Mac, install MacTeX. (This is needed when creating PDF files in academic paper format.)
1. Install & Initialize
pip install mystmd
myst init
It will ask if you want to run myst start right away, but since there’s no need to start immediately, enter N.
2. Directory Structure
mystmd automatically reads md and ipynb files without special configuration. It even reads files inside folders automatically. Additionally, note that if you index folder and file names like 01-, 02-, it understands that order. Also, if there are both folders and files in the same directory, it reads files first, then files inside the folders. So if you place an about-me.md file in the root folder and manage the rest of the materials inside folders, the about-me file will be positioned at the top.
The directory structure of this blog is as follows: (README.md is the main page of the blog.)
README.md
about-me.md
01-writing/
├── 01-why-i-use-myst.md
├── 02-blog-guideline.md
02-research/
├── 01-literature-review.md
├── 02-research-2.md
3. myst.yml
The most important file automatically generated when you run myst init is myst.yml, which contains all the settings for the blog. As noted in the first line comment below, refer to the official documentation for detailed information. Here are some options:
- Folders listed in the exclude section are not included in the blog.
- If you write your GitHub address in the github section, a GitHub icon will be created at the top of the blog.
- In site, you can set the blog’s theme, favicon, logo, etc.
# See docs at: https://mystmd.org/guide/frontmatter
version: 1
project:
  id: 7f4425d6-d197-4904-88a4-81cd23fa671d
  # title:
  # description:
  # keywords: []
  # authors: []
  github: https://github.com/myeongseok-kwon/blog
  # To autogenerate a Table of Contents, run "myst init --write-toc"
  exclude:
    - venv/**
    - draft/**
    - data/**
    - images/**
site:
  template: book-theme
  options:
    favicon: images/favicon.ico
    logo: images/site_logo.png
4. myst start
Enter myst start to run the blog. Since the blog runs locally by default, you need to be connected to the internet. To exit the blog, press Ctrl + C. You can check the address in the terminal where you ran it, by default it runs at https://
5. Deployment
Refer to the github pages deployment guidelines to deploy your blog. In summary:
- Create a github repository (public), and push your working directory.
- Select the Github Actions deployment method in github repo -> Settings -> Pages as shown in Figure 1.
- Run myst init --gh-pages
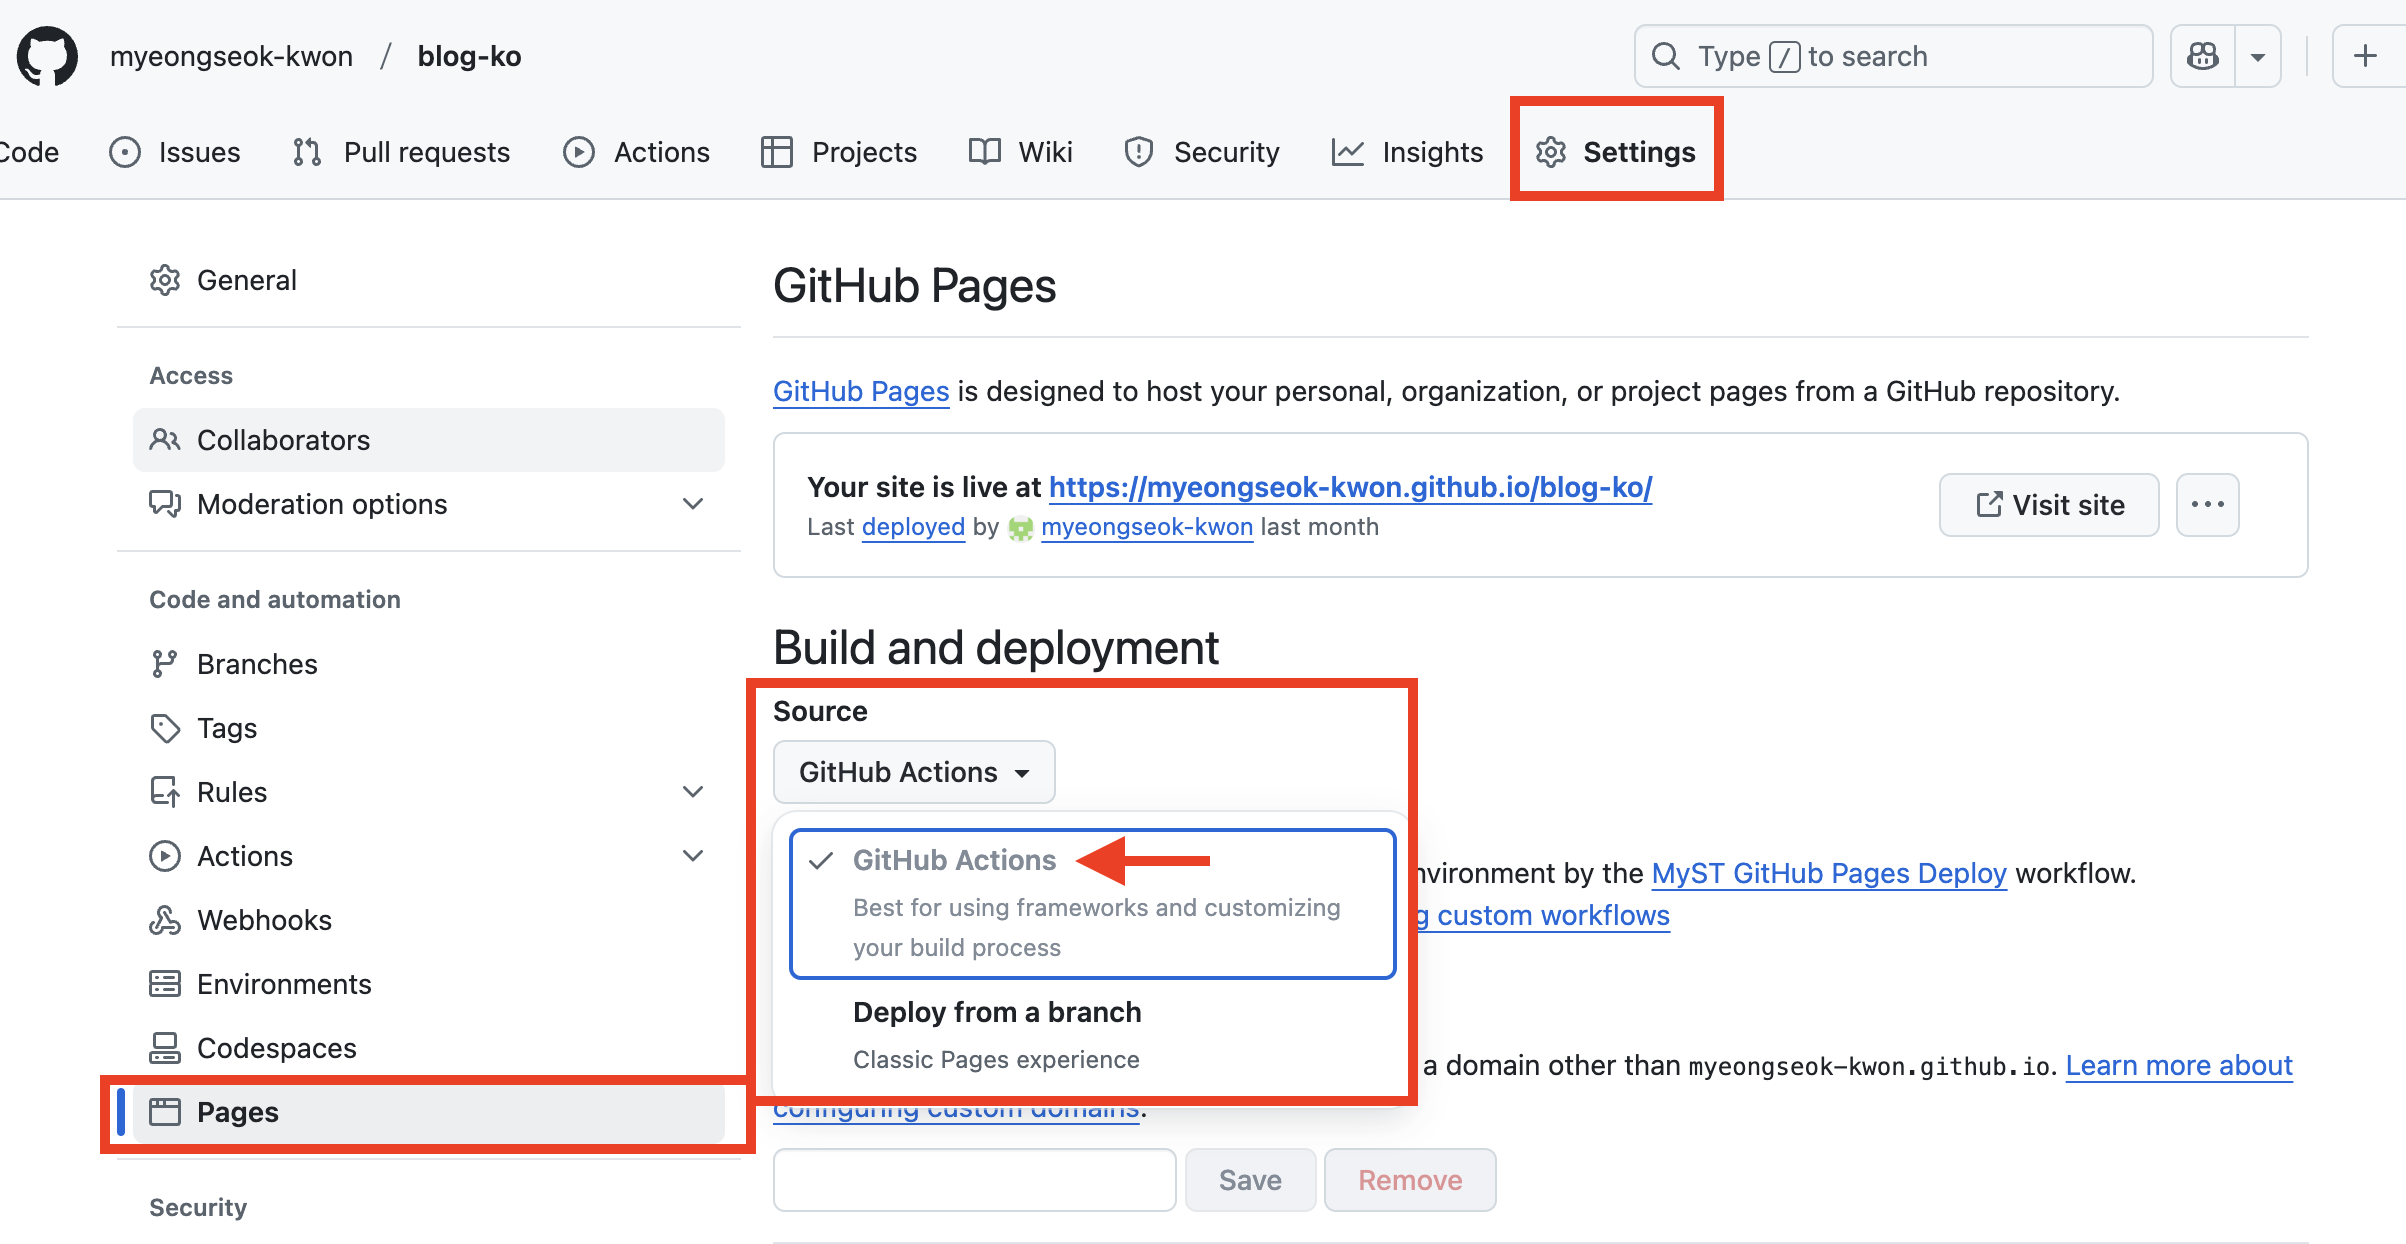
Figure 1:Selecting the GitHub Actions deployment method